JS Testing with Jest
TDD in JS

© We Can Code IT, LLC
Before we get started…
Before we can use Jest we need to install it. We're going to use NodeJS for that. The first thing we need is a project to add our tests to. So either choose an existing Spring project to add some JS to or make a new one (Spring Initializr).
Installing Jest
Now that we have a project, it's time to install Jest and test some JS.
- Navigate to the root of your project
- Initialize a Node project,
npm init -y(this is just to include our testing framework). You should now have apackage.jsonin your project root. - Next, install Jest,
npm i -D jest. After an installation process, you should now seejestinpackage.json - Run
jest --initto build a jest configuration file- Choose (y) to add the test script to
package.json - Choose
jsdomfor your testing environment - Choose (y) to add coverage reports
- Choose (y) to clear mock calls and instances betweenevery test
- You should now have a
jest.config.jsfile
- Choose (y) to add the test script to
- You are now ready to test your JS files
Test Suite Components
There are a few built in functions that Jest recognizes. These structure our test suites so that we know what we're testing. It also gives us an assertion library (similar to Hamcrest) to make our test assertions. Let's dive into them
describe()
The describe function is an organizational function that allows us to structure our suites. We're only testing one unit inside of any given describe function. These can be nested for more specificity. For example:
describe('MyComponent', () => {
    describe('myFunction', () => {
        // All tests here should correspond to MyComponent.myFunction
    })
})
This is helpful when we run our tests because it breaks everything down into an easy-to-follow outline
test() and it()
The next level of functions we have are the ones that assert direct behavior for a given unit. There are two that perform the same duties. If you need your tests to be backward compatible to other JS testing frameworks, use it instead of test. (We will be using test as we will never go back to a lesser JS testing framework…) This corresponds to the methods we write in our Java tests. Seen here:
describe('myFunction', () => {
    test('should add a class to a given element', () => {
        // Actual assertions will go here
    })
})
expect()
The final function we need to actually make some assertions about the behavior of our code is expect. This function is very similar to assertThat or assertEquals in our Java tests. This is where we can weigh our expected behavior against an actual result.
describe('addClass', () => {
    test('should add a class to a given element', () => {
        // Arrange
        const elem = document.createElement('p')

        // Act
        addClass(elem, 'newClass')

        //Assert
        expect(elem.classList.contains('newClass'))toBeTruthy()
    })
})
(Check all of the matchers you have at your disposal)
Time to run our tests!
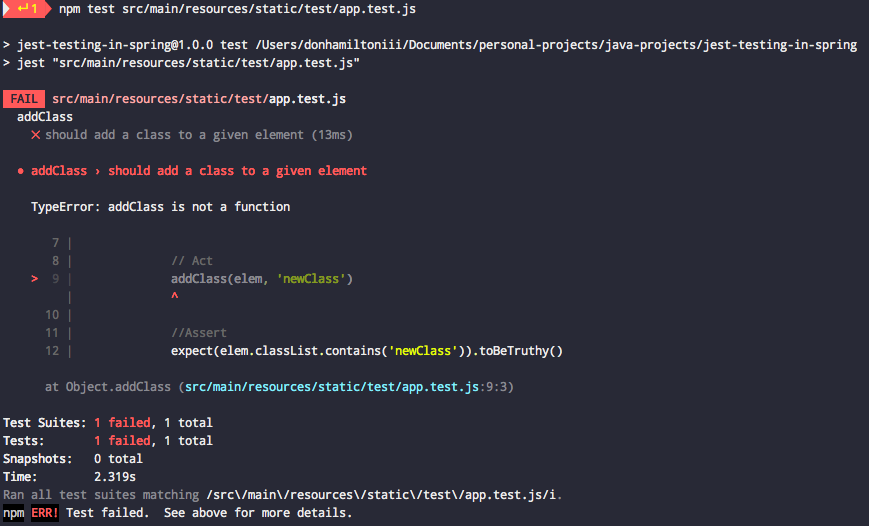
There are two different options we have when running our tests. First, you can run all tests using npm test in your command line to run all tests (in any test file) at once. You can also run npm test path/to/file. This can be useful for targeting a specific set of tests as you work on a single component.
Failure!
Yay!

That means…
Practice!
You now have a powerful tool available to you in Java as well as JS. You can use TDD to make sure your code is doing what you want. This testing suite will work with any framework you’re using as well. Clone the exercise here.